Who doesn't love a good water splash? Whether the splash is from a canon ball into a pool, macro shots of food splashing into a glass of water, running through a sprinkler, or just splashing around in a puddle, there's something undeniably satisfying about the sight and sound of water splashing. Capturing that perfect splash shot can be so satisfying. But let's be honest - capturing a fast-moving water splash can be challenging.
How to Shoot High-Speed Photography of Splashing Liquids?
- Use a fast shutter speed: A shutter speed of at least 1/1000th of a second is recommended to freeze the motion of the liquid.
- Use a high frame rate: A high frame rate allows you to capture multiple frames per second, increasing your chances of getting a good shot. Set your camera to continuous shooting mode to achieve this.
- Use manual focus: Set your camera to manual focus mode and focus on the point where the liquid will hit the surface.
- Use a low ISO: A low ISO setting will reduce noise and produce cleaner images. Start with an ISO of 100 and adjust based on the lighting conditions.
- Use a narrow aperture: A narrow aperture (high f-stop number) will increase your depth of field, keeping more of the splashing liquid in focus. Start with an aperture of f/8 and adjust as needed.
- Use a tripod: A tripod will keep your camera steady and help you avoid camera shaking. Make sure it is sturdy and can support the weight of your camera and lens.
- Use a remote shutter release cable or self-timer: Using a remote shutter release or self-timer will help you avoid touching the camera and causing the camera to shake.
If you've ever tried to capture a water splash with a mirrorless camera or DSLR camera, you know how frustrating it can be. No matter how fast your shutter speed is, the water always looks blurry and indistinct. That's because water moves really fast - like, really, really fast. And to capture a water splash in all its glory, you need an equally fast camera. That's where high-speed photography comes in. With a high-speed shutter speed setting on your camera, you can freeze the water in mid-splash, capturing every droplet and ripple with stunning clarity.
In this article, I'll show you how it's done! But first, let's make sure you have everything you need.
Start by gathering all of the necessary equipment:
• A reliable camera
• A lens with a long focal length
• An external flash with a light stand
• A tripod
• Remote shutter release cable
• A water source and subject to drop in the water
• A clear plastic bag to protect your camera gear
• Paper towels or regular towels for cleanup

How to Set Up Your Camera?
Setting up your camera and tripod for water splash photography might seem tricky, but it's pretty simple. First, find a sturdy surface to set up your tripod on - you want it to be as stable as possible to avoid any camera shake. Once you've got your tripod in place, attach your camera and make sure it's securely fastened.
Next, position the camera to aim at the spot where the water will splash. You might need to adjust the height and angle slightly to get it right. Finally, don't forget to lock your tripod head so your camera won't move during the shot.
Capturing water splashes isn't just about having the right camera equipment - it's also about your camera settings, timing, and technique:
Which Camera Settings Should You Use?
Okay, so you have your camera and tripod set up and ready to start capturing splashy goodness. But before you hit that shutter button, get your settings in check. It would be best to have the correct aperture, shutter speed, and ISO setting for a successful photograph.
Why is this so important, you ask? Your camera's settings determine how much light enters the camera, how long the shutter stays open, and how sensitive the sensor is to light. And when it comes to water splash photography, getting these settings, right can mean the difference between a blurry mess and a crisp splash.
Generally, you'll want to use a fast shutter speed (at least 1/1000th of a second) to freeze the motion of the water, a small aperture (around f/8 to f/16) to get a deep depth of field, and a low ISO (around 100-200) to minimize digital noise. Of course, these settings can vary depending on your lighting conditions and the effect you're going for, so don't be afraid to experiment and find what works best for you.
Play Around with Your Camera Settings
Adjusting the camera settings can help you achieve different effects and create a unique look for your water splash photos. For example, increasing the shutter speed can create a more dramatic, frozen-in-time effect, while decreasing the shutter speed can create a more flowing, blurred effect.
Similarly, adjusting the aperture can control the depth of field and how much of the photo is in focus. And remember your ISO - increasing the ISO can make the image brighter, but also introduce more digital noise.
So, play around with different settings and see what works best for the effect you're trying to achieve. You might find that a slower shutter speed and a wider aperture give you a dreamy, ethereal effect or that a fast shutter speed and a small aperture give you a crisp, high-contrast effect. The possibilities are endless, so don't be afraid to experiment and have fun with them.

Capturing the Water Splash
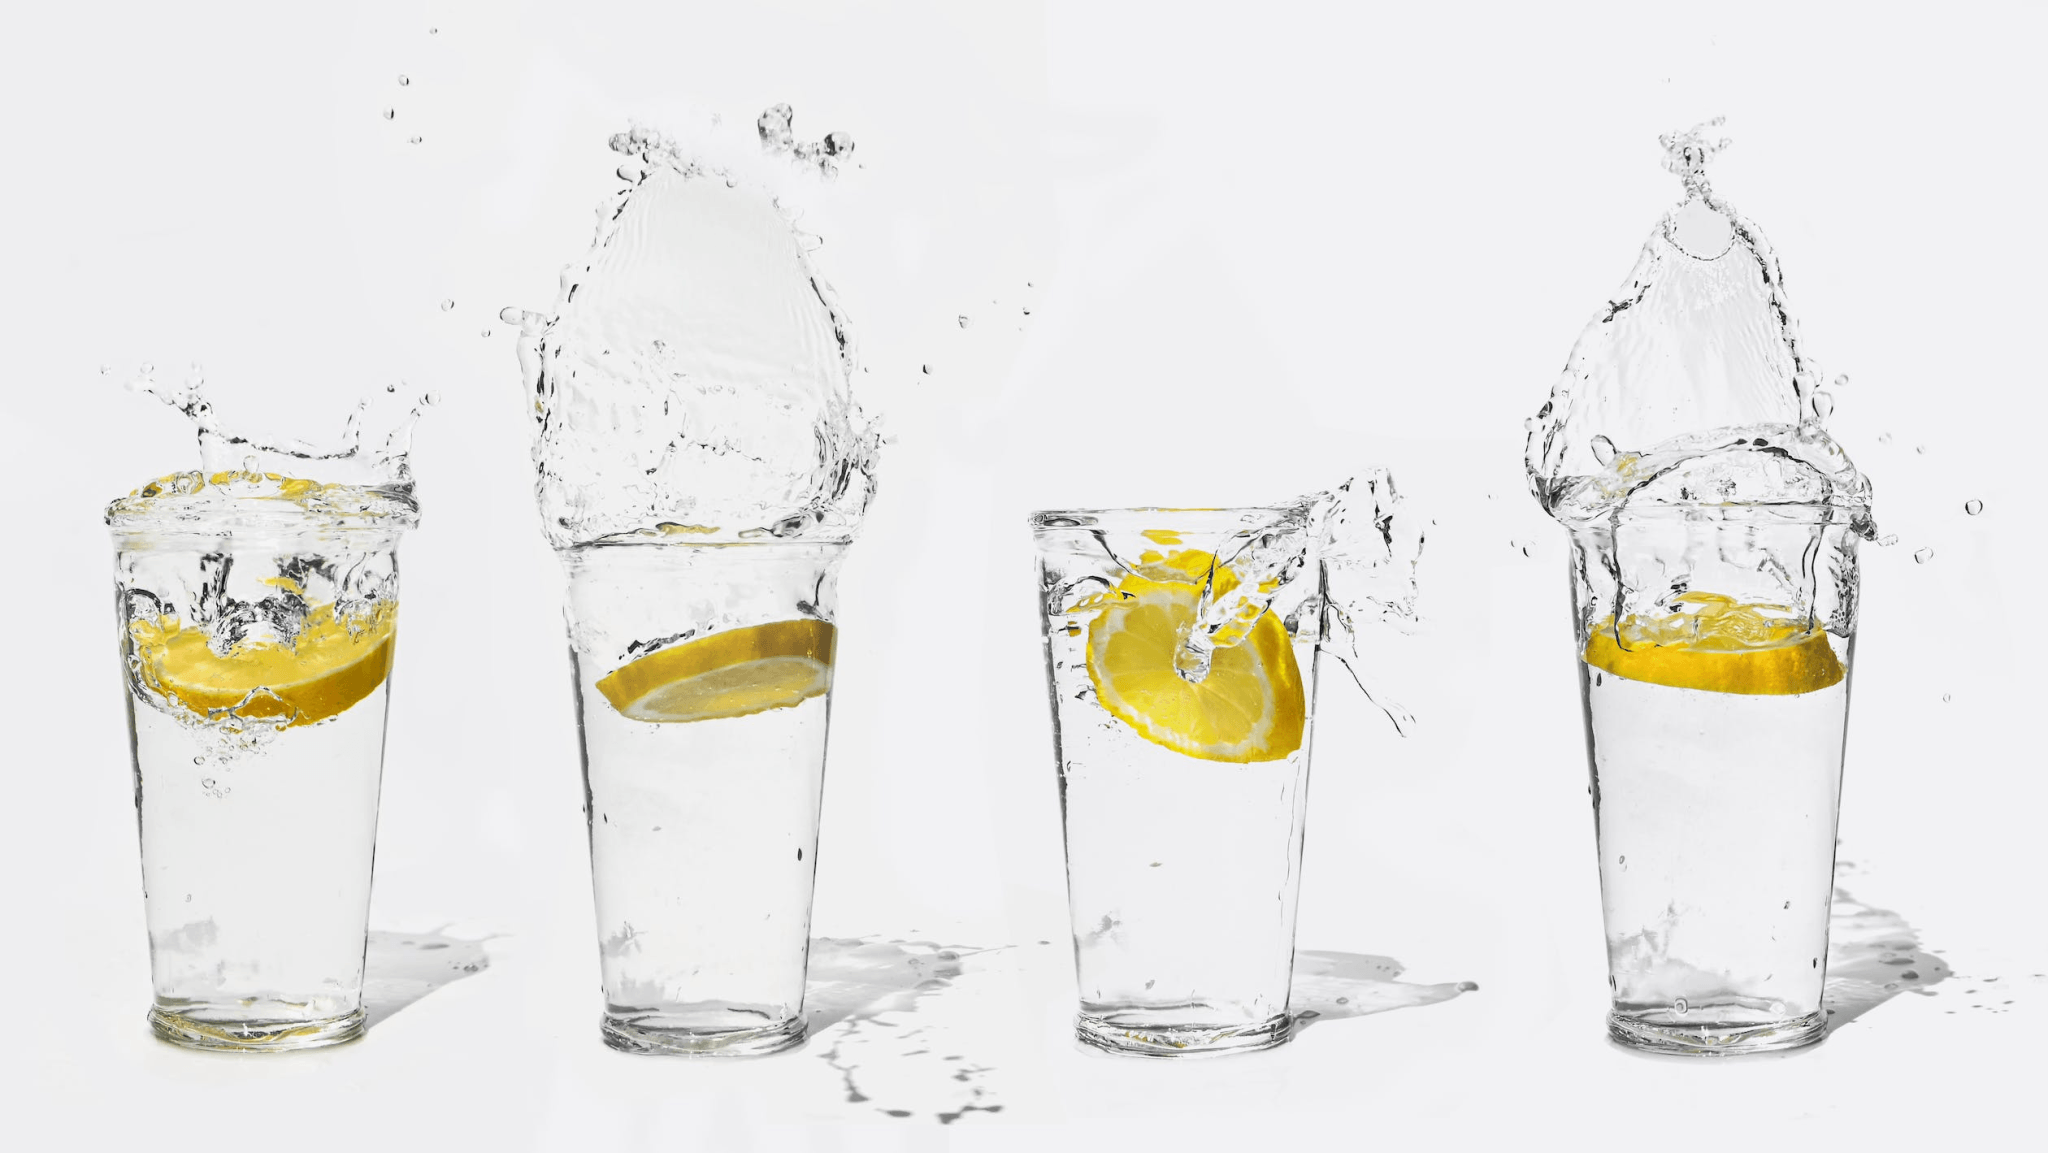
One way to create a water splash is to drop water from a dropper or a container. To do this, fill your dropper or container with water and hold it above the area you want the splash to occur. Then, release the water while simultaneously triggering the camera shutter. It might take a few tries to get the timing right, but you'll be amazed at the results once you do. And don't be afraid to play around with different amounts of water and dropping heights to create different splash shapes, effects, and sizes.
To get the perfect shot, you must capture the exact moment when the water hits the surface and creates that beautiful splash.
Timing is everything when it comes to water splash photography. To get the perfect shot, you must capture the exact moment when the water hits the surface and creates that beautiful splash.
So how do you time it right? One technique is to use a remote shutter trigger to release the shutter while you drop the water. This way, you can coordinate the timing of the drop and the shutter release more precisely.
Another tip is to use burst or continuous shooting mode (this allows you to take multiple shots in rapid succession). This increases your chances of getting that perfect splash shot and gives you more options once you finish and start the post-processing step.
And, of course, practice makes perfect - the more you experiment and play around with different techniques, the better you'll get at timing your shots and capturing those stunning water splashes.
How to Properly Use Your Flash
Using a flash can be a great way to add extra light to your water splash photos, but getting the flash power right is crucial. If the flash is too bright, it can overpower the image and wash out the details of the splash. On the other hand, if the flash is too dim, the photo may be underexposed and lack the necessary contrast. You can adjust the flash output manually or use automatic flash exposure to get the right amount of flash power.
If you're adjusting the flash output manually, start with a low power setting and take a test shot. If the splash is too dark, increase the flash power and try again. If the splash is too bright, decrease the flash power. You can also bounce the flash off a reflector or wall to soften the light and create a more natural look. Ultimately, the right amount of flash power will depend on your lighting conditions and the effect you're going for, so don't be afraid to experiment and find what works best for you.

The Power of Editing
Post-processing can take your water splash photos to the next level by enhancing colors, adjusting contrast, and adding creative effects. One popular post-processing tool is Adobe Lightroom and Photoshop, which allows you to adjust exposure, contrast, saturation, and other settings to get the desired look. For example, you should increase the clarity to make the water droplets stand out more or adjust the vibrance to make the colors pop. You can also play around with different presets or filters to create a unique look, such as a vintage or filmic effect.
Cropping is another handy tool - you can experiment with different compositions to highlight splash parts or create a more dynamic composition. And, of course, remember to save your edited photo in a high-quality format, such as JPEG or TIFF, so that you can share it with the world and showcase your stunning water splash photography skills.
Final Thoughts
Capturing water splashes with high-speed photography can be a fun and rewarding challenge for photographers of all skill levels. Remember, using the right equipment and camera settings is crucial to get started. You can experiment with different containers and methods to get the desired effect when dropping the water. Don't forget to time the capture just right for the best shot.
Post-processing can take your water splash photos to the next level by enhancing colors, adjusting contrast, and adding creative effects. By following these tips and practicing your skills, you'll be well on your way to creating stunning water splash photos that will amaze and impress your friends, family, and followers.
If you've never tried high-speed water splash photography, you should give it a try. It's a fun and challenging way to experiment with your photography skills, and you never know what kind of fantastic shots you might capture.
So grab your camera, find a container of water, and start splashing around - you might discover a new passion and take your photography to the next level!


