Prism Photography is a newer technique to hit the scene. Although the concept and idea have been around for a while, it has been in the last decade that photographers tried to bring out this technique of using prisms to spray and refract light onto their subjects.
Now, photographers and videographers everywhere are using these prisms to their advantage to create striking photos with more dimension. Its popularity has reached an all-time high - use the hashtag #prismphotography to see all the results on social media.
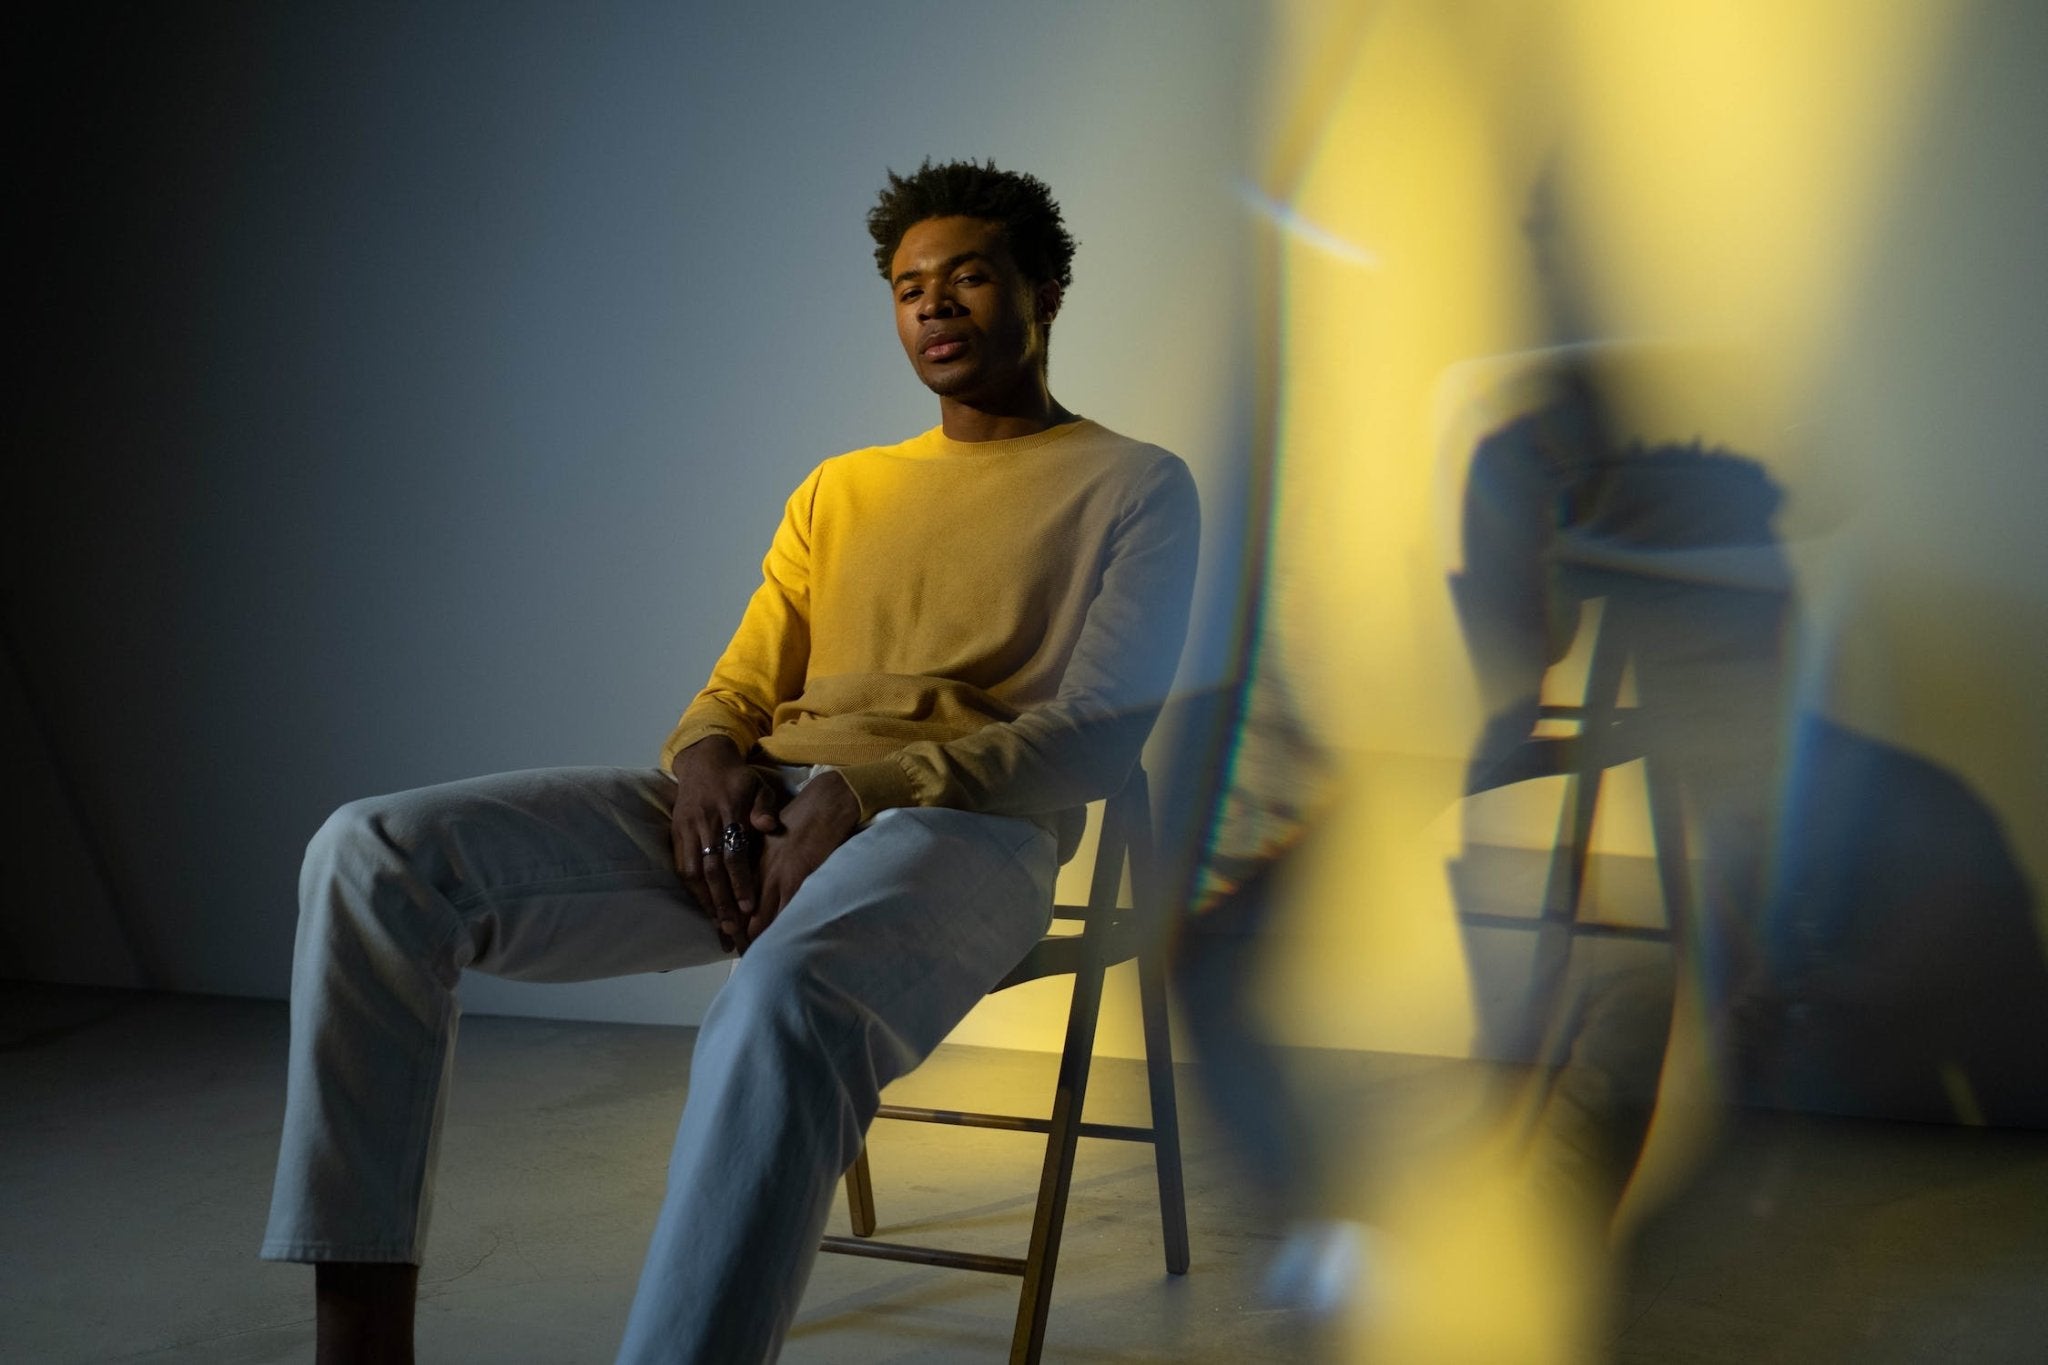
How to Use Prism Photography to Create Creative and Abstract Images?
- Know your camera's settings and use it correctly
- Don't use a narrow aperture
- Be creative with your light
- Don't use prisms on a cloudy day
To capture these mesmerizing shapes and colors in images, the photographer uses an equilateral prism or a fractal filter in front of the lens to warp the light as it enters the lens. This results in a photo that will make you feel awe-struck. The best part of this technique - is minimal post-editing! I've yet to see results that need to rely on Photoshop. This technique helps draw out the natural beauty of your subject.
You can play around with your prism to warp the light in various ways to give you all the control. You can place the prism in different spots at the front of your lens to get varying effects. Prisms can even enhance environments with poor lighting conditions. Hold your prism at the front of your lens to help draw light in and add some zest to an otherwise dull photograph.
Know Your Camera's Settings and Use it Correctly
If you're new to prism photography, the guide below will be your key to snapping the best images. Although taking prism photographs can have hurdles, understanding how to use a prism glass correctly will give you breathtaking results. This is a great technique to have in your brain to create stunning photographs. Take note of the do's and don'ts below.
Related article: Camera Settings Guide – Best Camera Settings in Photography
Release Priority
Since you are using a piece of glass close to your lens, it can cause some confusion with your camera. Use the release priority to have better control.
Single-Point AF
Again, since shooting through glass can cause your camera to be wonky, you will want to pick a single point to focus on. This glass can make it difficult for your camera to choose what to focus on. Always use a single-point AF.
Manual or Aperture Priority
Ultimate control will give you the end result you are striving for. Shoot in manual or aperture priority to have that complete control.
Related article: Best Aperture for Portraits
DoF
Your DoF (depth of field) preview button will help you see what your field of view really looks like. You need to use this if you aren't using a mirrorless camera.
Movement
Understand how the prism works in front of your camera. To capture the movement of colors, you must move the prism around and not keep it still. Experiment with different angles to see what colors and shapes get captured at different angles.
Related article: Photography Composition Techniques
Focus Priority
Stay far away from the focus priority. Your focus priority will only hinder your results since it waits for the lens to get in focus before taking a photograph. You want to control where and how your lens focuses.
Automatic or Shutter Priority
You never want to shoot in automatic or shutter priority, which will take away your control. Since you have the prism before your lens, you will want all the control to predict the results.
Pick the Best Aperture
Invest in a wide aperture prime lens of around 50mm to 85mm. Then, set your aperture around f/1.8 to f/3.5 for a soft color effect. You want to have a shallow depth of field. Once you hold your prism close to your lens, the actual prism will blur just a bit to give your that ethereal feeling.
Don't Use a Narrow Aperture
Don't opt for a narrow aperture, it will make your prism glass go into focus, and everything behind it blurred. And you want the opposite, and you want to see through the glass.
Make sure you experiment with your apertures, and remember that it exists. Your aperture will be a trial and error, so you must test out how different apertures look.
Related article: Best Aperture for Portraits
Be Creative with Your Light
Don't be shy with artificial light. It can be your friend! This will help you add more light to alter your image.
Check out these related articles to help you get creative with LED lights:
Don't Use Prisms on a Cloudy Day
Stay away from cloudy days unless you have artificial light to incorporate into your image.
The above guide will point you in the right direction when photographing prisms. Jump on this trend now to capture astonishing images. Check out our wide variety of prism accessories to up your game!
Want more articles? Check them out here:
Related article: Close up Photography: How to Take Stellar Close-Up Shots
Related article: How to Make Cool Effects with Colored Gels
Related article: Atmosphere Aerosol Haze Spray Review
Related article: UV Filters: What Do UV Filters Actually Do?


