If you're bored of the typical studio setup with only white light, strobes, and diffusers, it's time to add some color to your portraits! In this article, discover how easy it is to use colored gels to spice up your pictures.
Gels are filters that you put on your light to change the color. They usually come in different sizes, thicknesses, and colors. You can find them here at our photography online store. Some gels are cheaper than others, so be mindful of how much you're willing to spend. Also, be aware that gels can melt if left on a hot light for too long (such as during a music video shoot).
Gels are an extremely flexible medium. There are limitless possibilities with gels, and I recommend sticking to similar colors when combining them (and not creating any issues in post-production later).
Here are some of my favorite gel lighting designs to produce fresh and unique photos. I utilize continuous led light as a personal choice, but studio flashes or speedlights may also be used to achieve the same effect.
One-Color Gels
The most basic and traditional gel lighting style. There is no special equipment for this look; you may shoot your model in any way and replace the white light with color. The picture might be washed out if your colored gel isn't vital.
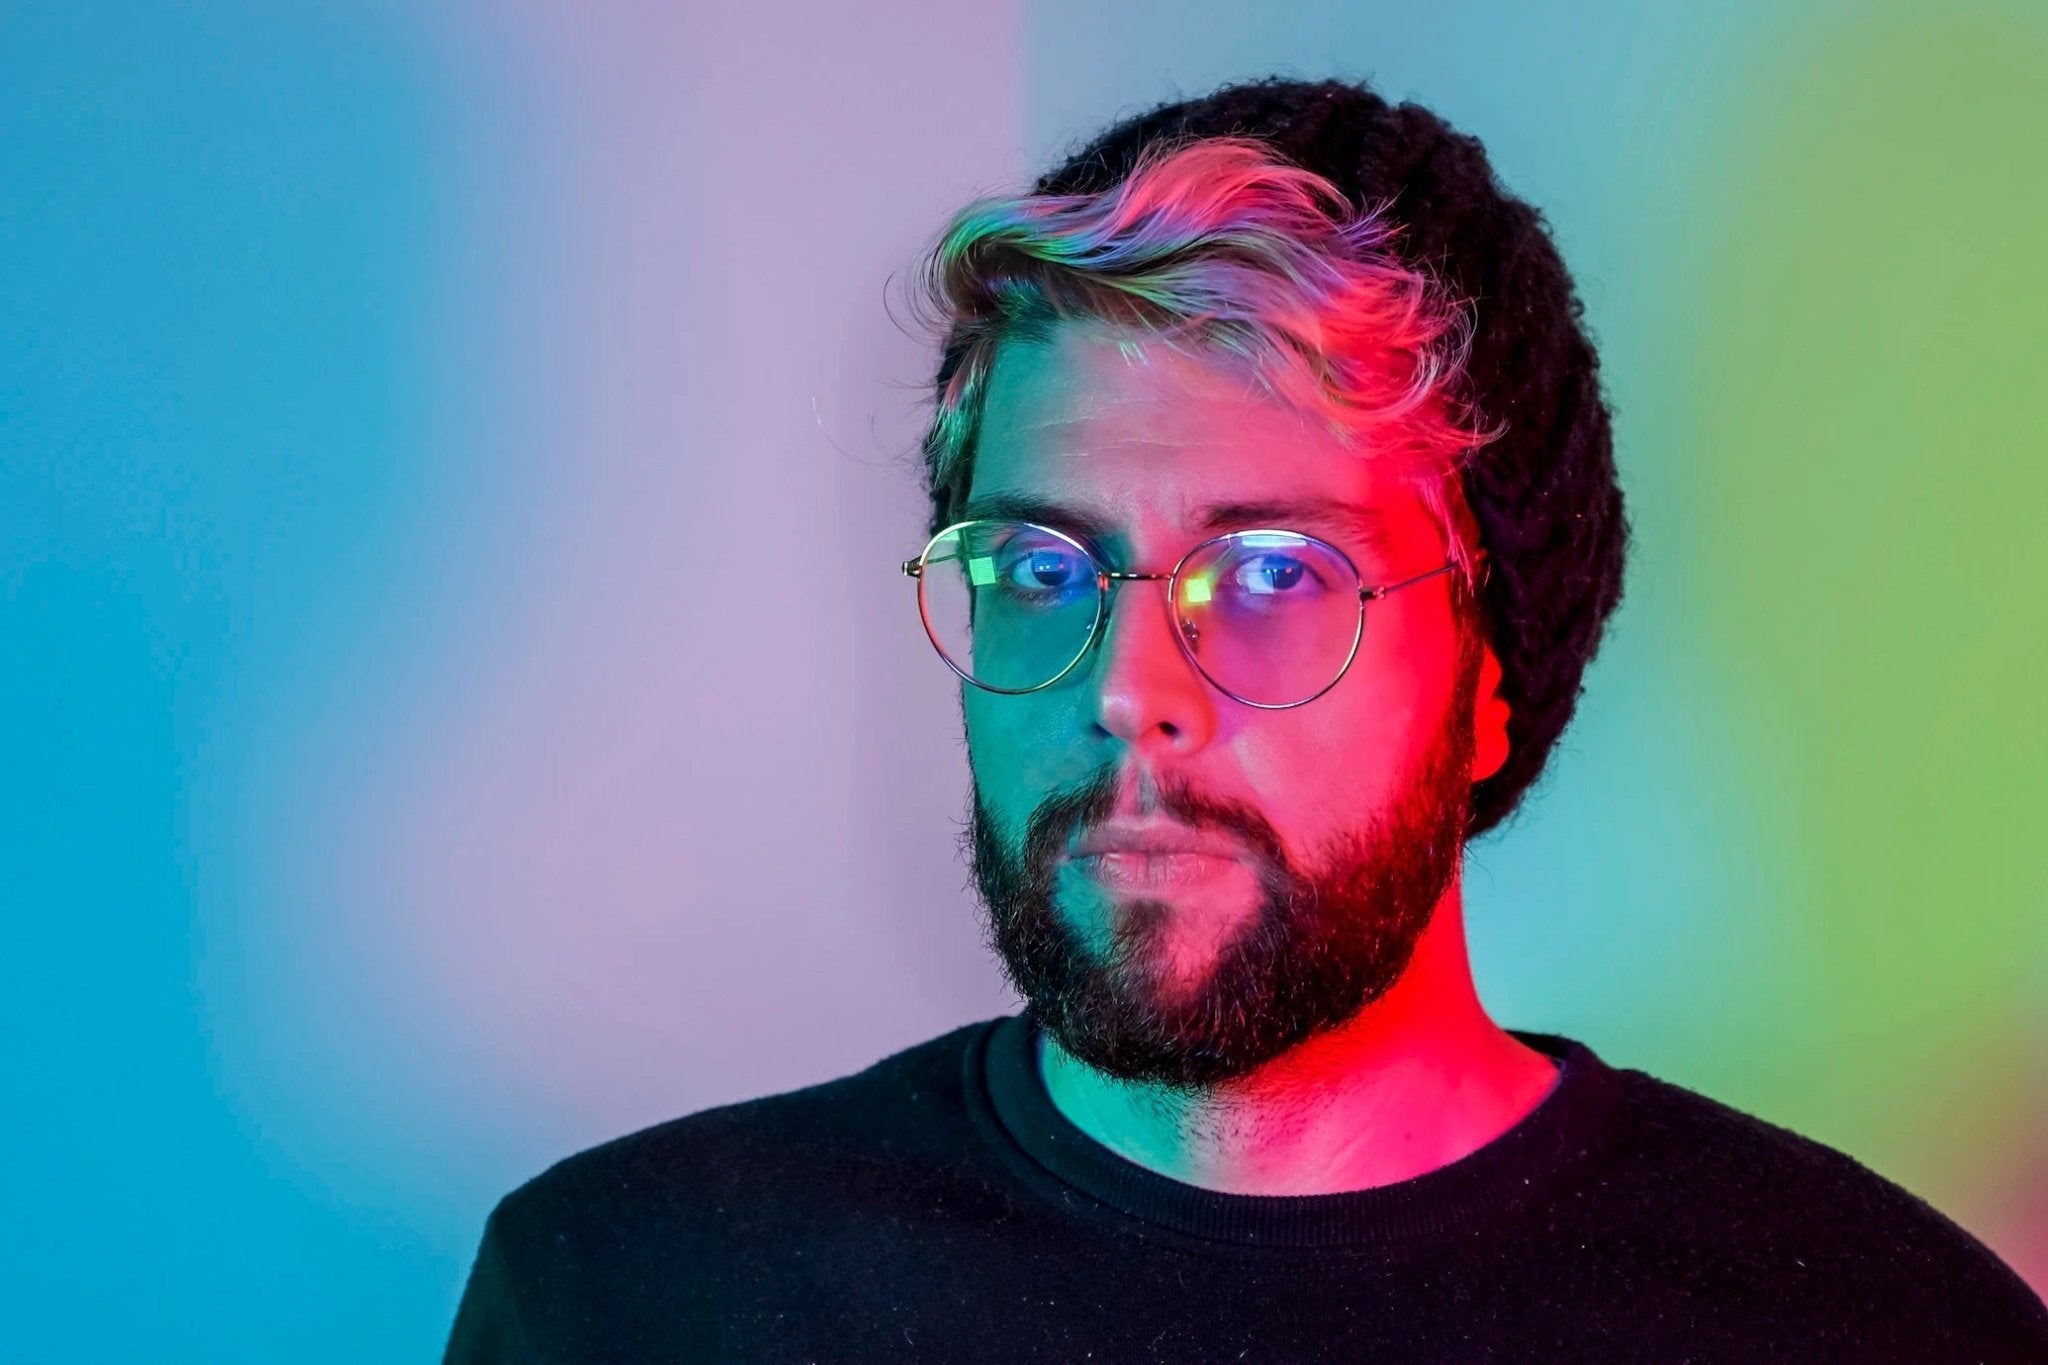
Double Color Set Up
The double-colored gel setup is my personal favorite. All you need are two lights, one gelled with each color. Set them aside and wait for the magic to happen! The division can be very eye-catching and intriguing.
Tri-Color Set Up
You may use whatever colors you'd like, but I prefer one of them to be white. The white offers a sense of calm and refinement to the entire appearance.
If you want to pick your own color, go for it. If you're unsure what would look best in the center of your arrangement, try a brighter hue and darker colors on the sides.
You can adjust the side lights behind the model to achieve a softer or more intense look by turning the lights towards or away from the model.
Using Gels for Rim Lights
If you're looking to add some drama and edge to your portraits, using gels for rim lights is a great way to do it. Keep in mind that the placement of the lights will depend on your model's build. I usually set up a white light in front of the model and two colored gels on side-pointed lights off to the sides.
I've found that the best colors for a rim light look are purples, blues, reds, and greens. Oranges tend to get lost with white light.
Background Gels
The most straightforward way to brighten any room is to point colored gels -equipped lights at the back wall.
You can create a traditional studio light setup with two gelled lights pointed towards the back wall to make your subject stand out against the background. This is an effect that all great studio photographers strive for.
Next, go out there and experiment with colors!
Related article: Beginner’s Guide to High Contrast Photography
Related article: What is Saturation in Photography
Related article: What is Value in Photography
Related article: White Balance Photography: What is White Balance


